miercuri, 16 septembrie 2020

Garlic Butter Roasted Corn with Feta


   I loooooooooooooooooooooooooooooooove, love love love LOOOOOVE corn! Ok, I think I made my point understood. I'd put corn in everything!!! Naturally, I also love boiled corn in the summer! When I found this recipe on my favorite blog (Serving Dumplings), a recipe that also has garlic and feta, I was sold!!! You can boil your corn beforehand or just roast it like I did. It's just a new way of having your corn in the summer :D

Ingredients:

- 2 corn cobs (one per person or if you love corn, more than one :D)

- 50g (1/2 cup) butter, melted

- 2 garlic cloves, grated

- 1/2 tsp smoked paprika

- salt + black pepper

- 50g feta, crumbled

- chilies


Steps:

1. Preheat the oven to 230°C.

2. Line the corn cobs on a baking sheet, pour the melted butter, add garlic and sprinkle with smoked paprika, salt and pepper. Roast for 20-25 minutes, turning halfway through.

3. Remove from the oven, top with crumbled feta and chilies. Sprinkle with extra salt and pepper. Bon appetit! :)

duminică, 13 septembrie 2020

OMG Quattro Formaggi Pizza


   If you like cheese as much as I do, you'll always go for Quattro Formaggi everything be it pasta, pizza or scrambled eggs in the morning :))) I tried various brands of pizza that produced Quattro Formaggi and I had a favourite but I felt I also had to try my own, so, for the first time, I did! I chose 4 cheeses that I thought would work together and I'm happy to say the experiment paid off! :D Now, let's talk business, meaning, how to get this drooling pizza above:

Ingredients for a pizza (6 slices):

*a person will definitely be satiated with 2 slices, so don't bake too many pizzas ;)

- store bought pizza dough or make your own

~ 300g Panzani 4 Formaggi pasta sauce

- 150g gruyere

- 150g gorgonzola

- 120g smoked cheese

- 120g mozarella

- fresh basil

The sauce I used

Steps:
1. Thaw the dough. Take it out of the freezer about 1 hour before preparation.
2. Once the dough is thawed out, preheat the oven at 220C.
3. Put some baking paper on a pizza tray, then place the dough in the tray.
4. Add the sauce.
5. Slice the 4 cheeses and layer them playfully.
6. Add basil leaves on top.

Before

7. Put the pizza in the oven for about 12-15 min until the cheeses start browning. Bon appetit! :)

After


sâmbătă, 5 septembrie 2020

The Dana Salad


   Before you say anything, yes, I do have a salad with my name on it. That's because when Oli and I were first dating I thought of making a new salad that he would like so I took elements of a Greek salad and I added my own twist. He liked it so much that ever since then he calls it The Dana Salad so that we know exactly what to put in it :) It's become a staple in our household and I'm surprised that I haven't posted it sooner. Wanna know what's in it? Follow the recipe below!

Ingredients for 3-4 servings: 

*We always have leftovers, but we never mind because it's so healthy we can eat it later or the next day if we put it in a sift in the fridge

- 3 boneless chicken thighs 

- lemon pepper seasoning

- 2 medium tomatoes, diced

- 2 medium cucumbers, diced

- 1 red pepper, diced

- 1 big carrot, grated

- 1 medium red onion, roughly chopped

*1 green onion (optional), chopped

- corn

- 250g telemea or Feta, shredded 

- sunflower or olive oil

- salt 


Steps:

1. Cut the chicken into bite sized pieces, pan sear it on both sides and season it with lemon pepper as you cook it. Make sure it's evenly coated.

2. Put the cut veggies in a bowl, then add the cooked chicken and the shredded telemea. 

3. Season with salt and generously coat in oil. Thoroughly mix everything. Bon appetit! :)


luni, 31 august 2020

Easy Tuna Deviled Eggs


   At my brother's recommendation, for the first time in my life, today I made deviled eggs stuffed with tuna instead of paté. OMG!!! Why haven't I done this sooner??? What have I been waiting for? I think the easiest explanation is that once you're born a Romanian you will associate deviled eggs with paté all your life and you would end up losing so many flavours! This absolutely exceptional, super duper easy recipe made me want to reinvent Romanian dishes by switching one or two key ingredients and just give them a refresh! I feel so inspired! 

So let me tell you how to make this dish yourself:

Ingredients for 6 deviled eggs (2 people):
- 3 medium eggs
- a can of good quality tuna, sifted - without the brine or oil 
- 7 Tbsp mayo mixed with greek yogurt (Choose to make your own mayo, it's always better!)
- spices: paprika, chili

Steps:
1. Boil the eggs for 8 minutes.
2. Half the eggs and take the yolks out.
3. Blend the tuna with the egg yolks and a tablespoon of mayo and yogurt mix.
4. Stuff the egg halves with the tuna mix using a teaspoon then turn them upside down.
5. Pour a tablespoon of mayo on every deviled egg.
6. Sprinkle some paprika and chili for extra zing. Bon appetit! :D


vineri, 28 august 2020

Summery fish tacos with homemade tortillas


   Who doesn't love a good taco? Tacos are perfect for quick summer dinners and they punch a lot of flavour! This time I also made my own tortillas for the first time in my life with a recipe from here and I'll show you how to make it yourself. It's easy peasy, believe me! :D The taco recipe was taken from "Yum and yummer" recipe book written by Greta Podleski. 

Tortilla recipe (tweaked the size of it and I also used half of the original recipe):
Ingredients for 8 tortillas of 11 cm:
- 1,5 cups all-purpose flour
- 1/2 tsp salt
- 1/2 tsp baking powder
- 40 ml extra virgin olive oil or sunflower oil 
- 1/2 cup warm water

Steps:
1. Combine flour, salt and baking powder in the bowl of a stand mixer. Using the dough hook, mix dry ingredients until well combined.

2. Add oil and water with mixer running at a medium speed. After about 1 minute, or when mixture comes together and begins to form a ball, decrease mixing speed to low. Continue to mix for 1 minute or until dough is smooth.

3. Transfer dough to a lightly floured work surface. Divide into 8 equal portions. Turn each piece to coat with flour. Form each piece into a ball and flatten with the palm of your hand. 


4. Cover flattened balls of dough with a clean kitchen towel and allow to rest for at least 15 minutes (or as much as 2 hours) before proceeding. We left them for 1 hour.

5. After the rest period, heat a large pan over medium heat. Roll each dough piece into a rough circle, about 11 cm diameter, keep work surface and rolling pin lightly floured. Don’t stack uncooked tortillas on top of each other or they will stick together.


6. When the pan is hot, place one dough circle into the pan and allow to cook about 1 minute or until the bottom surface has a few pale brown spots and the uncooked surface is bubbly. If browning too fast, reduce the heat a bit. If it’s taking longer than a minute to see a few pale golden brown spots on the underside of tortillas, increase the heat a bit. Flip to other side and cook for 15-20 seconds. The tortillas should be nice and soft but have a few small brown spots on the surface. 

7. Remove from pan with tongs and stack in a covered container or zippered bag to keep the tortillas soft. 


And now, let's fill them with delicious stuff! :D

Ingredients for 8 tacos:
Mango salsa:
- 1 diced mango (make sure it's ripe)
- 1 avocado, diced
- 1/2 red pepper
- 1 diced red onion
- 2 Tbsp minced jalapeno peppers
- 1 Tbsp minced fresh cilantro
- 1 Tbsp freshly squeezed lime juice
- a pinch of salt

Lime mayo sauce:
- 1/3 cup light mayo
- 1 Tbsp freshly squeezed lime juice
- 1/2 tsp grated lime zest
- 1/8 each chili powder and ground cumin

Fish:
- 700g white fish fillets (we used carp because we couldn't find cod or tilapia that the book recommends)
- 2 tsp olive oil
- salt and freshly ground black pepper
- 1 Tbsp freshly squeezed lime juice

Steps:
1. Combine all salsa ingredients in a medium bowl and mix well. 
2. Pat the fish dry with paper towels and sprinkle both sides with salt and pepper. Heat olive oil in a pan over medium-high heat. Add the fish and cook for 2-3 min or until the edges start to look brown. Carefully flip the fish and cook about 2 more minutes. Transfer the fish to a plate and squeeze some lime juice over top.
3. To assemble tacos, flake the fish or cut it into small pieces. Place it over the bottom of warmed tortillas, top with salsa and drizzle the lime mayo on top. Bon appetit! :)

duminică, 23 august 2020

Cheesy Peasy Salmon Pasta


   If you love pasta as much as I do and you wanna try a new recipe, you're in the right place:) Let me show you a delicious way to marry salmon, asparagus, peas and pasta :D I prepared the recipe from the "Yum and yummer" book written by Greta Podleski, but I tweaked the cooking cream and the quantity of lemon juice because ours wasn't saucy enough and I don't know about you, but I like all my pastas SAUCYYYY!!!

Ingredients for 2 servings:

-  170g uncooked bow-tie pasta

- 1 cup chopped fresh asparagus

- 3/4 cup frozen peas

- 2 tsp butter or olive oil

- 2 tsp minced garlic

~ 400 ml of light cooking cream

- 1/4 cup freshly grated Parm cheese and extra for serving

- 1 Tbsp minced fresh dill

- lemon juice from a lemon

- 1 tsp grated lemon zest

- aprox. 150g cooked salmon, cut into chunks

- freshly ground black pepper


! Important note: respect the indicated veggie quantities (I'll explain why below)

Steps:

1. Cook the pasta according to the package directions and add the asparagus and the peas during the last 3 minutes of cooking time.

2. While the pasta is cooking, prepare the sauce. Heat the butter in a pan over medium heat until it's frothy. Add the garlic and cook it until it's golden (about 1 min). Be careful not to burn it!

3. Add the cooking cream to the pan and then increase the heat to medium-high. Cook and stir until the mixture bubbles. Add the cheese, the dill, the lemon juice and the lemon zest. Mix well. 

4. Add the salmon to the pan and cook it almost completely. 

5. Drain the pasta and the veggies and add half of them to the sauce. I recommend to first see if half of it is enough to feed 2. (I didn't respect the exact measurements for the peas and the asparagus and I think I put in too many veggies because I ended up with a double recipe and I wish I had only added half of it in the sauce :) ) Add more cooking cream if it's not too saucy.

6. Mix all the ingredients and serve immediately with freshly ground black pepper and extra Parm cheese on top :) Bon appetit!

luni, 10 august 2020

Nachos


   Nachos is one of my favorite summery dishes to have from back in the days of Off the Wall, the restaurant my husband had. I love how easy it is to make, how tasty and crunchy it is and you'll love it just as much cos it's a summery MUST! So, let me teach you how to make your own Nachos to share with your friends over a party or have it for lunch or dinner yourselves :) No matter the occasion, nachos will surely be a crowd pleaser! :D

Ingredients for 1 tray (aprox. 4 people):

-4 wraps
-1 big or 2 small tomatoes
-1 stem of green onion
-corn
-beans
-olives
-2 chicken thighs
-tex Mex seasoning / chicken seasoning / grill mix
-a big roll of cascaval afumat (~250g), grated
-sour cream
-guacamole (freshly made)

Steps:
1. Cut the wraps into stripes then cut them again into triangles and fry them. Put salt on them when they come out of the pan.
2. Put the seasoning on the chicken, then pan fry it.
3. Put the nachos, the chicken and the cheese in the oven for about 5 min until the cheese melts
4. Have the veggies precut (diced) so that when you take the nachos out of the oven, you can put the rest of the veggies on top right away so that they stick with the cheese before it hardens. 
5. Dip the nachos in sour cream and / or guacamole when you eat it.  That's it! Bon appetit! :D


miercuri, 5 august 2020

Garlicky shrimp zucchini pasta


   We discovered this recipe HERE when we ran out of dinner ideas (after browsing this blog, recipe books and other blogs). Yep, from time to time, I get to that point when I really don't know what I would want to eat. We had lots of salads lately and it's too hot outside to have something heavy, so when this recipe was found I could hear the heavens opening and the angels singing "Laaaaaaaa" (you know what I mean :))). 
    It's pasta, but it's NOT with pasta because you use zucchini to make the body of the dish and they're called "zoodles" :D How cool is that? Add shrimp and creaaaamy garlicky sauce and you win me over every time! So I HAD to try it asap. And tonight was the night. I knew it was gonna be delish and here I am, posting this recipe so you can imagine my reaction when I had the first bite. Mmmmm, utter joy! So now, let's help you experience that joy yourselves! :D

Ingredients for 3-4 servings:
- 3 Tbsp. butter, divided
- around 500-600g medium or large shrimp, peeled and deveined
- salt
- freshly ground black pepper
- 4 cloves garlic, minced
- 3/4 cups heavy cream (~180 ml)
- 1/2 cups grated Parmesan (or more, GO NUTS, I did :)))
- 6 halved cherry tomatoes
- freshly chopped parsley
- 3 medium zucchini, cut with the peeler or the spiralizer (or about 4 cups zoodles)

Steps:
1. In a large pan over medium heat, melt 1 tablespoon butter. Add shrimp and season with salt and pepper. Cook until shrimp is pink and opaque, about 2 minutes per side. Transfer shrimp to a plate. (Keep juices in skillet.)
2. Melt remaining butter in skillet then stir in garlic. Cook until fragrant, about 1 minute.
3. Add the heavy cream. Bring to a simmer.
4. Stir in Parmesan, tomatoes, and parsley. Simmer until tomatoes have softened and the mixture has thickened slightly, about 3 minutes. 
5. Return the shrimp to the skillet and add the zucchini noodles. Toss to combine and serve immediately. Bon appetit! :D

Good to know! To make the zoodles or more like the zucchini fettucine, peel the zucchini until you reach the seeds, then throw away the core ;) 

Roasted peaches and blueberries with ice cream


   It's summer, it's SUPER HOT outside and you feel like a dessert. Nothing seems appropriate unless it contains ice cream, isn't it? Well, it just so  happens that I tried this new recipe I found on one of my favourite blogs - HERE - and I fell in love with it! Roasted summer fruit with ice cream? YES, PLEASE! Lemme show you how I made it:

Ingredients for around 4 servings:
- 2 peaches, quartered
-100 g each: blueberries or whichever other berries you have or love (including strawberries, raspberries or blackberries)
- 4 Tbsp brown sugar
- 1 tsp vanilla extract
- 1 tsp cinnamon
- 1 Tbsp lemon juice
- 1 tsp lemon zest
- 4 Tbsp rum
- vanilla ice cream

Steps:
1. Preheat the oven to 200C.
2. In a bowl, combine brown sugar with lemon juice + zest, vanilla, cinnamon and rum.
3. Spread the fruit on a sheet pan, brush with the brown sugar mixture and slide into the oven. 


4. Roast for about 20 minutes, or until the fruit is bubbling.
5. Remove the roasted fruit from the oven, let it cool for a bit and transfer to a serving dish. 
6. Serve with vanilla ice cream on top! Yummmm! Bon appetit! :D

miercuri, 29 iulie 2020

Cheesy stuffed eggplant


   Stuffed eggplant is one of my go-to recipes when I don't know what to cook. It's easy to make and really delicious. This time I found a new cheesy recipe here and I tweaked it a bit to make it my own :D It's sooo cheesy and sooo good that it was worth sharing! So let me tell you how I cooked it:

Ingredients for 4 servings:
- 2 medium eggplants
- a medium white onion
- a small carrot
- 2-3 medium tomatoes
- 400g minced meat (I used pork but you can use a mix if you prefer)
- 2 cloves of garlic
- 2 tsp salt
- a pinch of fresh pepper
- 1 Tbsp chopped fresh parsley
- 200g grated cheese (of your preferred choice)
- 30 ml oil

Steps:
1. Cut the eggplant into 2 lengthwise including the tail.

2. With a spoon, remove the eggplant core, but leave a layer of about half a cm. Sprinkle with salt and set aside. You will see that a brown liquid will accumulate.

3. To make the stuffing, dice the eggplant core, the tomatoes, the onion and the garlic and grate the carrot on a small grater.

4. Put the oil in a pan, add the onion and the carrot and quickly cook in the pan, over high heat, for 2-3 minutes. 

5. Now add in the minced meat. Let it cook for 10 minutes.

6. Add the diced tomatoes, diced eggplant, salt, pepper and garlic and let everything simmer for another 10-15 minutes. At the end, add the parsley.

7. Preheat the oven to 200 C, fire up and down in electric ovens, medium to maximum fire in gas ovens.

8. By now the eggplant halves have softened and the bitter liquid came out. Wash them with running water and dry them well with napkins.

9. Place the eggplant halves in a baking tray, add the stuffing and then generously sprinkle the grated cheese on top.

10. Pour a cup of water in the tray and then cover it with aluminum foil, but make sure it doesn't touch the eggplants (I used toothpicks for this). 

11. Put the eggplants in the oven to tan ;)  Bake them for 40 min, then take the tinfoil off and let the melted cheese brown for 5 more minutes. 

Bon appetit! :D


miercuri, 22 iulie 2020

Fluffy buns and braided bread


   I found this recipe during the pandemic when everybody started making their own bread. I needed a good recipe and I saw it in a friend's pictures. She made braided bread and I was in love! It looked so good! So fluffy and such an elegant braid! So I decided to make my own bread using that recipe and I have to say that after 2 or 3 other recipes, this one was the first that worked! It looks amazing and it tastes just as amazing! What did the trick for me was using the kithen machine instead of kneading the dough by hand. This is the result of my bread:


   Today I want to present to you another option using the same recipe: buns for home made burgers or just buns if you like them more than regular bread (I do). I used half of the regular recipe for making 4 buns and the whole recipe for making 2 braided loaves of bread. Pick whichever you like best! :)

Ingredients for 4 buns or a loaf of braided bread (double the quantity for two loaves of bread):
- 300g 000 type flour
- 200g of milk
- 25g butter 82%
- 8g of salt
- 7g sugar
- 10g fresh yeast or 3g dry yeast
- an egg for glazing
- poppy seeds and/or sesame seeds for decoration

Steps:
1. For making the dough, mix 175g of flour (the rest comes later), the sugar and yeast.
2. Put the butter and the milk in a small pot over low heat (I chose 3) until the butter melts in the milk.
3. Mix the 2 compositions and beat the dough with the mixer for 5 minutes until it blisters.
4. Add the rest of the flour and the salt and knead the dough with the kitchen machine hook for about 5 minutes. Of course, it can also be kneaded by hand but you need lots of force in yor hands and enough patience to knead for about 10 min.
5. Let the dough rise in a large bowl until it doubles in size. Cover it with a bag and place it near a source of heat. 

For the BUNS:
6. After the dough rose, in order to have even buns, you will need to weigh the dough. You will have around 550g of dough and you will need to divide it into 4 parts of aprox. 135g and then form the four buns. 
7. Place the dough balls in a tray lined with baking paper and let them rise for another 30 minutes under a bag or a kitchen cloth.
8. Half way in, preheat the oven at 170°C.
9. After the 30 min passed, beat an egg and carefully brush the buns. Add the seeds on top.
10. Bake for 30 min at 170°C (for electric ovens use the function up + down + ventilation or the middle floor for gas ovens).
11. Let the buns cool down before cutting them. Bon appetit!


For the braided BREAD:
6. After the dough rose, in order to have an even braid, you will need to weigh the dough. You will have around 550g of dough if you use the half recipe and you will need to divide the dough into 3 parts of aprox. 135g. 
7. Cover the 3 dough balls with a bag or with a kitchen cloth until you take them out and process them one by one. 
8. Stretch each dough ball into a rectangle of about 30 × 20 cm and then roll the dough as tight as possible into a roll. That way your bread will have a beautiful shape.
9. Then roll the dough roll (I know, it sounds funny:P) on the table until it reaches a length of approx. 40 cm. Do the same with the rest of the dough. 
10. Join the 3 rolls at one end and start braiding the dough. Place the roll on the left tightly over the one in the middle, then the one on the right over the one in the middle. Work tightly and evenly. At the end join the 3 ends and your braid is ready.
11. Place the braided bread in a tray with baking paper and let it to rise for another 30 minutes, also under a bag.
12. Half way in, preheat the oven at 170°C.
13. Beat an egg and carefully brush the braids. Add the seeds on top.
14. Bake for 30 min at 170°C (for electric ovens use the function up + down + ventilation or the middle floor for gas ovens).
15. Let the bread cool down before cutting it. Bon appetit!

vineri, 17 iulie 2020

Apple and cinnamon waffles


   If you wake up to a dreadful rainy day and you want to make it better, then do yourself a favor and have this dish for breakfast! It will turn your day around! What could be better than crispy waffles with apple, cinnamon and some hidden walnuts and then a beauuutiful blanket of cream and berries and a silky maple syrup on top? Are you drooling yet? Good, cause here's the recipe:

Ingredients for 4 waffles:
- 125g butter
- 40g sugar
- grated lemon zest from one lemon
- 2 eggs
- 125g flour
- 1/2 tsp baking powder
- aprox.120 ml lukewarm milk
- one big apple
- a handful of chopped walnuts
- 1/2 tsp cinnamon
- 1 Tbsp rum essence

Topping:
- cream
- berries (or any other fruits you might prefer)
- cinnamon
*Optional: maple syrup or honey

Steps:
1. Mix the cubed apples with cinnamon, sugar, rum and chopped walnuts and let this mixture stand for a while.
2. Beat butter until frothy and add the grated lemon zest and the eggs.
3. Mix flour with baking powder and stir it into the eggs, turn by turn with the milk.
4. Finally add the apple-walnut-mixture.
5. Top your waffles with cream and berries or any other fruits you might prefer and then pour some maple syrup or honey on top. Bon appetit! :)

miercuri, 15 iulie 2020

Summery avocado chickpea salad with chicken skewers


   It's summer, so you might want to try a light dinner. I have the perfect idea! It's a new recipe from "Yum and yummer" recipe book written by Greta Podleski. Super healthy and super nutritious! I love all Greta's recipes! :) 

Here it goes:

Ingredients for 3-4 people:
Salad:
- 1 can chickpeas, drained and rinsed
- 1 1/2 cups peeled, diced cucumbers
- 1 1/2 cups halved cherry tomatoes
- 1/2 cup minced or thinly sliced red onions
- 1 medium avocado, diced
* my addition: a can of corn (God knows how much I love it :D)

Dressing:
- 2 Tbsp freshly squeezed lemon juice
- 2 Tbsp olive or sunflower oil
- 1 Tbsp balsamic vinegar
- 1 Tbsp minced fresh dill
- 1 tsp Dijon mustard
- 1 tsp pure maple syrup or liquid honey
- 1/4 tsp each sea salt and freshly ground black pepper

Skewers:
- I bought marinated chicken skewers from Lidl, but you can marinate your own with chicken thighs or chicken breast

Steps:
1. In a large bowl, combine all salad ingredients, being careful not to squish the avocados.
2. Whisk together all dressing ingredients in a small bowl or measuring cup.
3. Pour over salad and mix well. Taste and add more salt and pepper if you like.
4. Grill your chicken skewers.
5. Serve immediately. Bon appetit! :)

miercuri, 8 iulie 2020

Sour cherry brownie bundt


   What do you first think of when I tell you ”sour cherry dessert”? My answer: always a brownie. I just love love loooove chocolate desserts so it's understandable why I chose to bake this for International Chocolate Day a few days after I had picked my own sour cherries :D 
   I found this recipe online on a Romanian blog I follow quite often for new ideas. It always delivers and I'm never disappointed. Today I chose to bake this brownie in a bundt pan because I wanted a smaller quantity and I also wanted it to be pretty. So? Shall I tell you how to make it? Don't worry about the many steps, it's actually quite easy to make, trust me! :D

Ingredients 
*I used half of the original recipe for this bundt, but if you want to bake a whole rectangular 35 x 25 cm pan, double the quantities
- 3 eggs
- 100g sugar
- 25g dark chocolate
- 25g butter 82% (and some butter for the bundt pan)
- 15g cocoa
- 40g of flour
- a pinch of salt
- 1 packet of vanilla sugar
- 300 g pitted sour cherries

Steps:
1. First of all, preheat the oven to 170C with ventilation (medium stage for gas ones). Then melt the chocolate and butter on bain marie (bowl placed over the pot in which the water boils). Leave to cool.

2. Separate the eggs. Beat the egg whites well with a pinch of salt. (You can use an electric mixer like I did.)

3. When the foam is hard, add 100g of sugar and continue beating until you get a hard, dense and shiny foam (if you turn the bowl over your head, the foam doesn't fall on your head :P).

4. Mix the yolks separately with 100g of sugar and vanilla sugar. Mix until you get a foam. 

5. Add the melted chocolate and butter (which has cooled a bit and no longer burns) and mix until smooth.

6. Sift the flour and the cocoa through a sieve. It's very important to do this if you want a perfect, fluffy brownie.

7. Add the flour and cocoa over the egg yolk and chocolate mix.

7. Then gradually add the egg white foam and mix lightly with a spatula. Be careful not to crush the egg whites. 

8. Spread butter all over the inside of the bundt pan so that your brownie won't stick when it's ready.

9. Pour the composition into the bundt pan and smooth with a spatula.

10. Place the sour cherries on the dough one by one. Mix them with the dough slowly, using a spatula. If you don't want sour cherries in your bundt, you can leave them on top. I like mine to be all over the brownie when I bite into it :D

11. Put the bundt in the preheated oven at 170C (heat up + down + ventilation) respectively the middle stage in the gas ovens. Bake the cake for 25 minutes. Then reduce the heat to 150C and bake it for another 15-20 minutes.

12. When it's done, let it cool for a bit, then turn your bundt upside down and ta-ra! Here's your cake!

13. Serve with ice cream! Yummmmmm! 

Bon appetit! :D

miercuri, 1 iulie 2020

Oreo Chocolate Strawberry Cake


   You know that moment when you see videos of uber delicious recipes online that you drool at by just looking at them and then you dream them at night until you put them into practice. This recipe is one of those :))
   I think I can pretty much sum it up into: Oh My God! I haven't tasted something this good in a while! I really expected it to only look good in a video and that's all, but this time it also worked wonders in real life too. Might have helped that I followed this recipe closely so I used good quality chocolate and the exact amounts as specified. Either way, YOU GO TRY IT! It's Dana approved!:D

Ingredients for 10-12 servings:
Crust
330g Oreo cookies
110g butter, melted

Chocolate Filling
200g milk chocolate
100g bittersweet chocolate
200 ml heavy cream

Topping
300g fresh strawberries
chopped nuts (almonds, pistachios, etc) - optional

Steps:
1. Place oreo cookies into the bowl of a food processor and blend until crumbs form. 
2. Add melted butter and pour over the crushed cookies. Process until evenly moistened. 
3. Press cookie mixture with the back of the spoon and your fingers where necessary  into the bottom and edges of a rectangular 5x14 inch (12 x 36 cm) tart pan or a regular round tart pan. 
4. Freeze until you prepare the filling, just for few minutes.
5. In a small saucepan, place cream over medium-low heat for a few minutes to get hot. No boiling or simmering needed. 
6. Remove from heat, pour over chopped chocolate and let rest for 1-2 minutes. 
7. Stir until dissolved.
8. Pour chocolate filling over oreo crust. 
9. Top with fresh strawberries and chopped nuts.
10. Refrigerate for at least 2 hours or overnight before serving.

Bon appetit! :)

miercuri, 24 iunie 2020

Beer honey chicken with oven-roasted potatoes


   This recipe was recommended to me by a friend a loooong time ago and it's heaven on a plate! The chicken is sooo moist, the sauce is very flavourful because of the beer and honey combination and the potatoes are crunchy on the outside but soft in the middle. I'm telling you, you need to try this recipe! One of the best dishes I've eaten lately! :D

Ingredients for 2 people:
- 2 chicken thighs
- 250 ml beer
- 2 Tbsp honey
- 3 Tbsp water
- 4 Tsp soy sauce
- 1 Tsp grounded mustard seeds
- 1 big onion julienned
- 8 - 10 garlic cloves, minced
- 4 medium potatoes, cut into cubes
- salt and pepper to taste
- oregano to taste
- sunflower or olive oil for coating


Steps:
1.  Preheat the oven at 200C. Cut the potatoes into cubes, then put them in a pan and add salt, pepper, oregano and oil. Mix well. Cover with tinfoil and put them in the oven for about 30 min then take the tinfoil off and leave them for 15 more minutes to get crispy on top.

2. Heat a large pan over medium-high heat, Add oil, then place the chicken thighs in the pan. Season them with salt and pepper, cover the pan with a big metal bowl and let the chicken cook for 3 minutes on each side. Then put the chicken on a plate.

3. To the same pan add the grounded mustard seeds and the minced garlic and stir a little.

4. Add in the julienned onion. Stir fry until translucent.

5. Add soy sauce, the water, the beer and the honey to make a sauce. Mix well.

6. Put the chicken back in the pan and cover again. Let the sauce reduce to half on medium-high heat (it will take at least 10 min, 5 min on each side). Check the thighs from time to time and don't forget to baste them.

7. Add more water if the sauce is too reduced before the chicken is cooked through. Also reduce the heat if you do this :)

8. Once cooked, transfer to a plate, take the potatoes from the oven and enjoy your dinner! 

Bon appetit! :)

luni, 22 iunie 2020

Looneyspoons veggie pizza with pesto, mozarella and feta


Hey!

Tired of too much meat in your meals and you feel like switching it up? Then this veggie pizza with yuuuummy cheeses will make your world go round! The original recipe is taken from The Looneyspoons, an all-time favourite book written by Janet and Greta Podleski. There it's called "It's a little pizza heaven" and the title doesn't lie ;) Of course, I tweaked it a bit, like I always do :))
By the way, I decided to go wild and I made my own pizza dough so I'll include the recipe for the dough too, just in case you wanna make your own.

Let's get started, shall we?

Ingredients for 2 pizzas:

Thin and flavourful dough: *recipe from chef Adrian Hădean
- 3 cups of 650 flour
- 1 1/2 cups of warm water
- 10g fresh yeast or 3g dry yeast
- 1 tbsp warm milk
- 2 pinches of sugar (used separately)
- 1 pinch of salt
- 1 tsp dry oregano
- 1 tsp dry basil
- 3 tbsp extra virgin olive oil

OR 2 pizza doughs from Lidl ;)

Topping for 2 pizzas:
- 2 tsp olive or sunflower oil
- around 6 sliced mushrooms (put a variety of them if you can)
- a haldful of broccoli florets cut small
- a medium zucchini
- 1/2 red bell pepper thinly sliced
- a small red onion thinly sliced
- 1/2 jar Barilla pesto sauce
- 1/2 jar pizza sauce or any tomato based flavored sauce (I used Barilla Napoletana)
- 2 tbsp freshly grated Parm cheese
- aprox. 150g mozarella di bufala balls
- around 60g shredded feta cheese
*my addition, optional: corn (as much as possible :P)


Steps:

Making the dough:
1. Mix the flour and water.
2. Add a pinch of salt and sugar.
3. Dissolve the yeast in the milk and a pinch of sugar, then add to the flour mix.
4. Add the oregano, basil and olive oil.
5. Knead the dough for about 15 min by hand or with an electric mixer (I used the second option) until it's soft, elastic and it comes off easily. You might need to adjust the water/flour combo.
6. Let it rise for about an hour close to a source of heat.
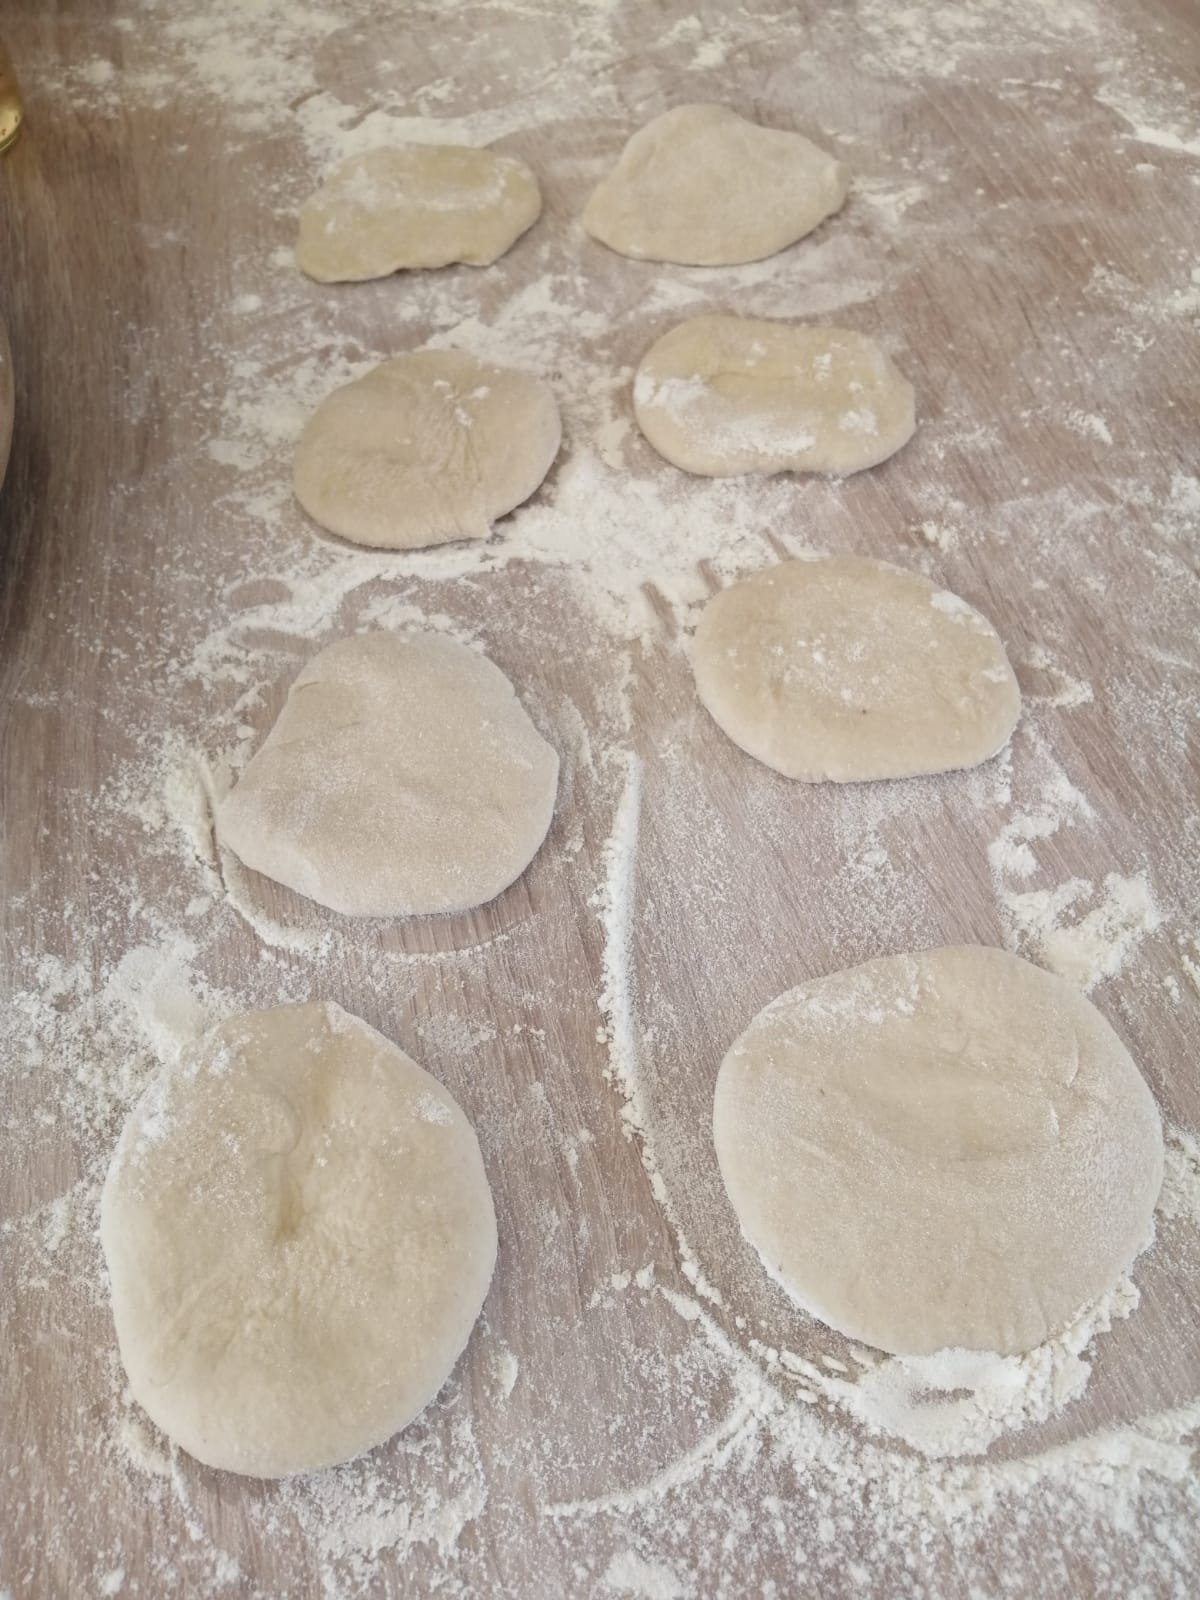
7. Separate it into 2 doughs for your two pizzas and work it like a true Italian pizzaro until you fill your 2 trays of pizza:


Adding the topping:
1. Tomato sauce (I added too much and the pizza ended up soggy, so make sure you don't add too much)


2. Cooooorn

3. Add Parm cheese :)


4. Add the sauteed veggies coated in pesto - In a big pan or a wok over medium heat add the oil and all the cut veggies. Cook and stir for about 6 min until they are tender, then take them off the heat and add in the pesto. Mix well, then spread on top of the pizza.


5. Add the mozarella balls, yummm!


6. Final step: Add the shreded feta :)


And this is how the pizza looks before going in the oven for about 10 min if the dough is fresh or 8 min if the dough is store bought and thawed. Bake it at 230C until the crust is lightly browned and cheese is melted.

7. Final product:

Bon appetit! :D


joi, 11 iunie 2020

Guacamole Egg Toast


Hey, friends!

Lately I've fallen in love with this simple yet absolutely addictive breakfast recipe. So much so that I keep craving it every other day! Since it's mouthwatering, healthy and super easy, I thought I'd share it with you! ;)

So here goes:

Ingredients for 2 toasts:
- 1 ripe avocado
- 1 medium tomato
- 1 small red onion
- a bit of lime or lemon juice
- salt and pepper
- 2 eggs
- 2 slices of bread
- Chipotle flakes or Chilli flakes

Steps:
1. Make the guacamole by peeling the avocado, then mashing it down with a potato masher. Then dice the tomato and the onion, add the lime juice, salt and pepper and mix everything.
2. Poach your eggs or simply put a bit of water in a pan then add the eggs and cook them like a regular sunny side up. Season with Chipotle or chilli flakes.
3. Toast your bread.
4. Assemble: toast, guacamole, egg.

Eggcelent breakfast, I'm telling you! Bon appetit! :D

marți, 26 mai 2020

Creamy roasted red pepper and sun dried tomato pasta


   Hi, pasta lovers!
   Today I want to present to you my new discovery! If your mouth is watering when you hear about roasted red peppers and you loooove sun dried tomatoes because they remind you of Italy, then read on! 
   I found this recipe shared on Instagram by a Romanian influencer who made it at home. She also took it from servingdumplings.com, a blog I've never heard about before. BIG mistake! If you take a glance around you'll instantly feel hungry and you'll become a follower! Yep, that's what happened to me too! 
   Now, you know that I usually love to improvise and tweak recipes to make them my own and I did that with this recipe as well. I decided not to blitz the roasted peppers and sun dried tomatoes into a sauce because I wanted to feel their texture and I skipped the tomato sauce and the lemon because I added Pesto Rosso from Lidl. Other than that, I decided to made my own pasta from scratch. Why not? Fresh pasta is always better, right?

   So here's how I did it:


Ingredients for 2 people:

250g pasta (or make your own from here)

3 red bell peppers

100 g sun dried tomatoes, oil drained but reserved

50 g grated parmesan

200 ml milk

1 shallot or small onion, finely chopped

2 cloves garlic, finely chopped

2 tbsp olive oil

1 jar Pesto Rosso from Lidl

salt + black pepper

1/2 tsp crushed dried chili

+basil and grated parmesan, for sprinkling


Steps:

1a. OPTIONAL: Make the pasta yourself.

1b. Place the bell peppers on a baking tray lined with parchment paper. Turn on your broiler to 250°C and if you can, place the peppers on the highest rack, close to the heating element (in my case it was the second highest because the tray wouldn't fit on the first one). Roast for about 5 minutes or until black spots appear, flip the peppers and continue to roast until all sides have been charred.

2. Place bell peppers in a plastic bag. Seal and let steam for about 5 minutes. Pull off the skins and remove the seeds, then dice them. Dice the sun dried tomatoes as well.

3. Bring a large pot of salted water to a boil. Boil the pasta until al dente and then drain.

4. In a medium pot, heat the oil and add garlic and shallot. Cook over low heat until soft, for about 5 minutes. Stir in the roasted bell peppers, sun dried tomatoes, pesto rosso and Parmesan. Pour milk, 50 ml oil from the sun dried tomatoes and season with salt and pepper. Bring to a boil.

5. Toss with pasta. Adjust chili, salt and black pepper to your taste and serve immediately with Parmesan and fresh basil.

Bon appetit! :)

luni, 6 ianuarie 2020

Cheesy tuna pasta bake


   This recipe was born from a craving. Let me explain myself. After a lot of heavy meaty meals during the winter holidays, I felt like tuna for a change and I realized I missed pasta as well so I decided to marry the two and make a tuna pasta bake. I made a similar recipe once before but I wasn't super impressed with it, so this time I looked up some inspirational recipes. I found one I liked and I decided to tweak it and this is how this recipe was born :)  It's soooo cheesy and soooo delicious you'll really want to go back for more! ;) I feel like cooking it again already :)))

Ingredients for about 3-4 servings:
- about 200 g of fusilli pasta or your preferred pasta
- a tin of tuna chunks in sunflower or olive oil 
- 3 cloves garlic, crushed
- a pinch of dried oregano 
- a pinch of chilli flakes
- 1 teaspoon mashed anchovy filets or paste
- salt and fresh ground black pepper to taste
- a 500 ml bottle of home made tomato sauce (Romanian "bulion") or a good quality store bought one
- about 100 g of grated Gruyere cheese or Parm cheese 
- about 6 slices of smoked cheese 

Steps:
1. Combine tuna and its oil from the tin, garlic, anchovies, oregano, and chilli flakes in a large saucepan over medium-low heat. Stir and cook for 1 minute once oil begins to sizzle.
2. Stir in the tomato sauce. Increase heat to medium and simmer for about 10 minutes.
3. Fill a large pot with oregano salted water and bring to a boil. Cook your pasta until just slightly undercooked (2 min less than the package advice), then drain. 
4. Stir cooked pasta into the tuna tomato mixture, then add the Gruyere or the Parm.
5. Pour everything in a glass tray and cover it with the slices of smoked cheese.
6. Put the tray in the oven at 185C for about 15-20 min or until the cheese on top starts to melt.

Bon appetit! :)